Click here to send us an email. Click here to call us.

Author: Amy Riley

This Margherita Pizza is a timeless favourite that highlights the simplicity and quality of its ingredients. The combination of tomato sauce, fresh mozzarella, and fragrant basil creates a burst of flavours with every bite. Whether you’re making it for a casual dinner or a special occasion, Margherita Pizza never fails to satisfy.

Ingredients:

For the Pizza Dough:

  •       1 pound pizza dough (shop-bought or homemade)
  •       Flour, for dusting


For the Pizza Sauce:

  •       1 can (14 ounces) crushed tomatoes
  •       2 cloves garlic, minced
  •       1 tablespoon extra-virgin olive oil
  •       1 teaspoon dried basil
  •       1 teaspoon dried oregano
  •       Salt and pepper to taste

For the Toppings:

  •       8 ounces fresh mozzarella cheese, sliced
  •       Fresh basil leaves
  •       Extra-virgin olive oil, for drizzling
  •       Salt and pepper to taste


Method:

Step 1 – Preheat the Oven: Preheat your oven to the highest temperature it can reach (usually around 260°C). If you have a pizza stone, place it in the oven to preheat as well.

Step 2 – Prepare the Sauce: In a saucepan, heat the olive oil over medium heat. Add the minced garlic and sauté for about 1 minute until fragrant. Pour in the crushed tomatoes and add the dried basil, dried oregano, salt, and pepper. Simmer the sauce for about 10-15 minutes until it thickens slightly. Remove from heat and set aside.

Step 3 – Roll Out the Dough: On a floured surface, roll out the pizza dough into a circle or your desired shape. If the dough is sticking, you can dust it with a bit more flour.

Step 4 – Transfer to Pizza Peel or Baking Sheet: If using a pizza stone, sprinkle some cornmeal on a pizza peel to prevent sticking. If you’re using a baking sheet, you can place the rolled-out dough directly on it.

Step 5 – Add Sauce and Cheese: Spread a thin layer of the prepared pizza sauce over the dough, leaving a border around the edges. Place the sliced mozzarella evenly over the sauce.


Step 6 – Bake the Pizza: If using a pizza stone, carefully slide the pizza onto the preheated stone in the oven. If using a baking sheet, simply place the baking sheet in the oven. Bake the pizza for about 10-12 minutes, or until the crust is golden and the cheese is melted and bubbly.

Step 7 – Garnish and Finish: Once the pizza is out of the oven, immediately scatter fresh basil leaves over the hot cheese. Drizzle a bit of extra-virgin olive oil over the pizza and season with a sprinkle of salt and pepper.

Step 8 – Slice and Serve: Allow the pizza to cool for a minute or two before slicing it into wedges. Serve the Margherita Pizza while it’s still hot and enjoy the wonderful flavours of the classic combination.

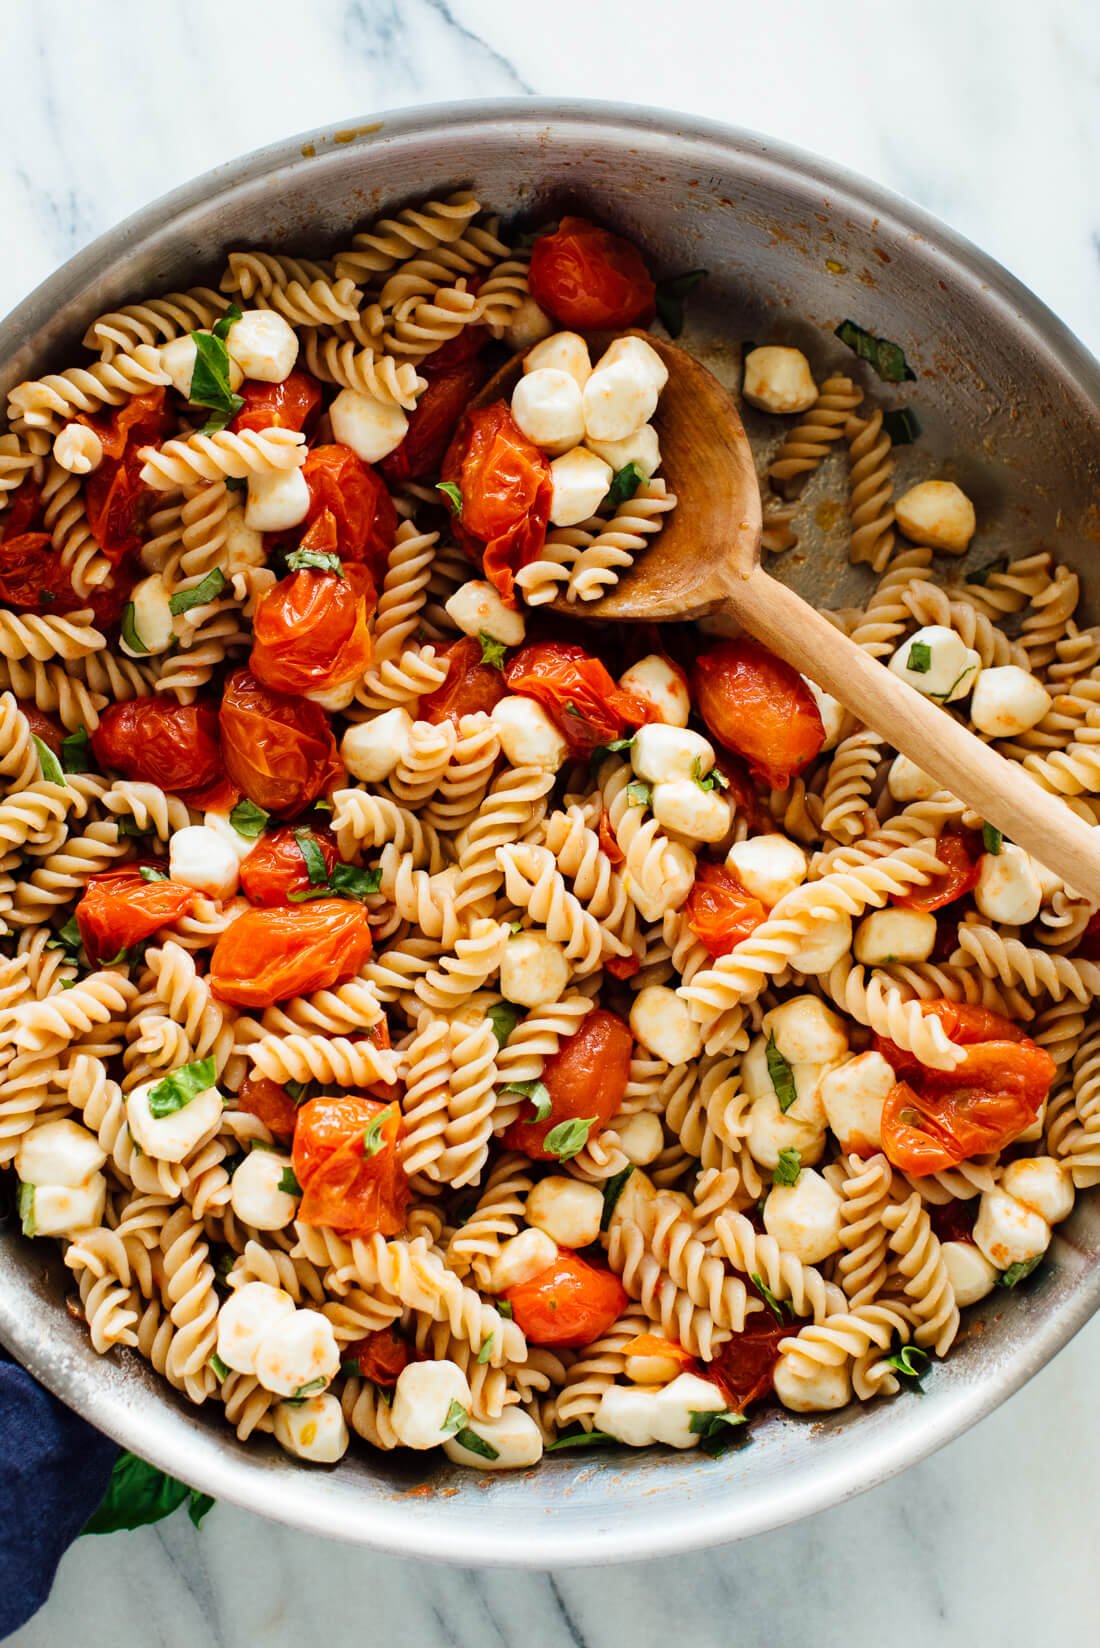
This Caprese Pasta Salad is a delightful fusion of the classic Caprese flavours—juicy tomatoes, creamy mozzarella, and fragrant basil—combined with pasta for a heartier dish. The balsamic dressing adds a tangy and slightly sweet note that complements the ingredients perfectly. Enjoy the harmony of flavours in this simple yet impressive pasta salad! 

Ingredients:

For the Salad:

  •       8 ounces (about 2 cups) cherry tomatoes, halved
  •       8 ounces fresh mozzarella cheese, cubed
  •       1 cup fresh basil leaves, torn
  •       8 ounces pasta (such as fusilli, penne, or farfalle)
  •       Salt for pasta water

For the Dressing:

  •       1/4 cup extra-virgin olive oil
  •       2 tablespoons balsamic vinegar
  •       1 clove garlic, minced
  •       Salt and pepper to taste

Method:

Step 1 – Cook the Pasta: Bring a large pot of salted water to a boil. Add the pasta and cook according to the package instructions until al dente. Drain the pasta and rinse it under cold water to cool it down. Set aside.

Step 2 – Prepare the Dressing: In a small bowl, whisk together the extra-virgin olive oil, balsamic vinegar, minced garlic, salt, and pepper to create the dressing. Set aside.

Step 3 – Combine Ingredients: In a large mixing bowl, combine the cooked and cooled pasta, halved cherry tomatoes, cubed fresh mozzarella, and torn fresh basil leaves.

Step 4 – Add the Dressing: Drizzle the dressing over the pasta salad ingredients. Gently toss the salad to ensure all the components are coated with the flavourful dressing.

Step 5 – Chill and Serve: Cover the bowl with plastic wrap or a lid and refrigerate the Caprese Pasta Salad for at least 30 minutes to allow the flavours to meld together.

Step 6 – Garnish and Enjoy: Before serving, give the salad a final toss. If desired, you can garnish the salad with additional fresh basil leaves or a sprinkle of grated Parmesan cheese for extra flavour.

Step 7 – Serve: Caprese Pasta Salad is perfect as a refreshing side dish for picnics, barbecues, potlucks, or as a light and satisfying main course for lunch or dinner.

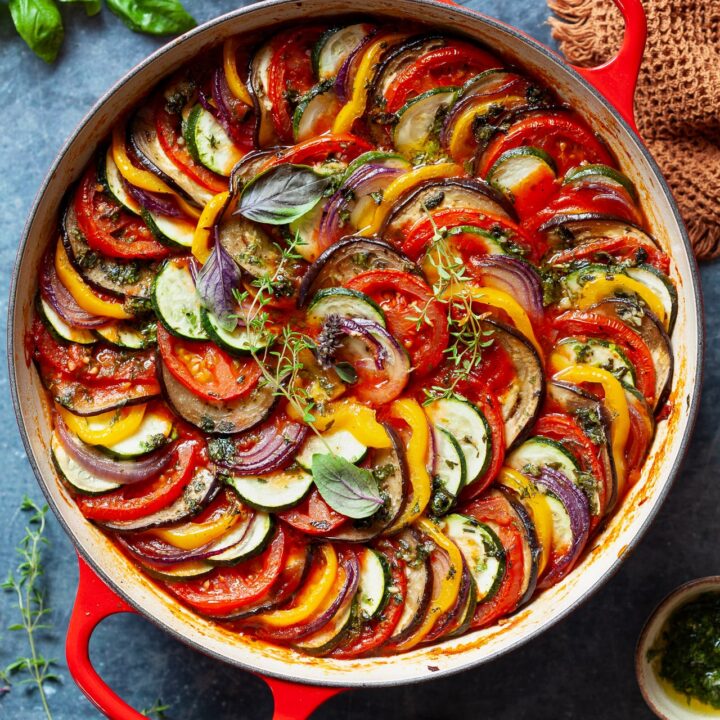
This traditional Ratatouille recipe celebrates the natural flavours of seasonal vegetables, resulting in a comforting and nutritious dish that will please both vegetarians and non-vegetarians alike. Enjoy the delightful taste of this French classic!

Ingredients:

  • 1 eggplant, cut into 1-inch cubes
  • 2 zucchinis, sliced
  • 1 red bell pepper, cut into 1-inch pieces
  • 1 yellow bell pepper, cut into 1-inch pieces
  • 1 green bell pepper, cut into 1-inch pieces
  • 1 large onion, chopped
  • 4 cloves garlic, minced
  • 4 large tomatoes, diced
  • 1/4 cup tomato paste
  • 2 tablespoons olive oil
  • 1 tablespoon fresh thyme leaves
  • 1 tablespoon fresh rosemary leaves
  • Salt and pepper to taste
  • Fresh basil leaves for garnish

Method:

  1. Sauté the Onions and Garlic: In a large pot or Dutch oven, heat the olive oil over medium heat. Add the chopped onions and sauté until they become translucent. Stir in the minced garlic and continue to cook for another minute until the garlic becomes fragrant.
  2. Add the Bell Peppers: Toss in the cut bell peppers and cook for a few minutes until they start to soften.
  3. Incorporate the Eggplant and Zucchini: Add the eggplant and zucchinis to the pot. Stir everything together, allowing the vegetables to cook for about 5 minutes until they begin to brown slightly.
  4. Stir in the Tomatoes and Tomato Paste: Add the diced tomatoes and tomato paste to the pot. Mix well to combine all the flavours.
  5. Season the Ratatouille: Sprinkle the fresh thyme and rosemary leaves over the vegetables. Season with salt and pepper to taste.
  6. Simmer the Ratatouille: Reduce the heat to low and cover the pot. Let the Ratatouille simmer for about 20-25 minutes, stirring occasionally, until all the vegetables are tender and the flavours have melded together.
  7. Garnish and Serve: Once the Ratatouille is ready, remove it from the heat. Garnish with fresh basil leaves for added freshness and aroma.
  8. Enjoy: Ratatouille can be served as a standalone dish, over couscous or quinoa, or as a side to grilled meats or fish.

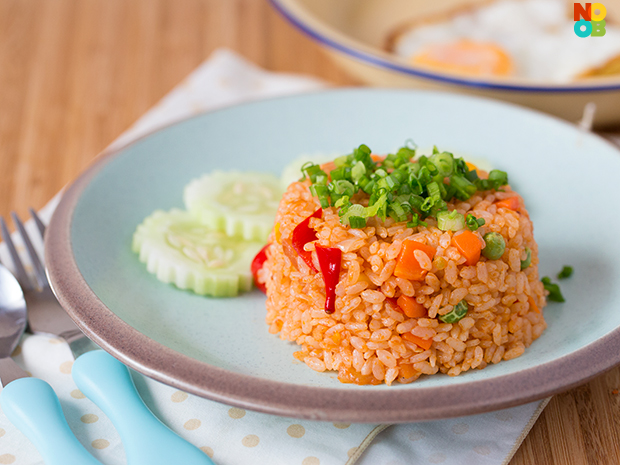
This Tomato Fried Rice is a delightful twist on traditional fried rice, incorporating the rich flavours of tomatoes and aromatic spices. It’s a great way to use up leftover rice and create a tasty and wholesome meal in no time. Enjoy the comfort and deliciousness of this easy-to-make Tomato Fried Rice!

Ingredients:

  • 2 cups cooked rice (preferably cold or at least cooled)
  • 2 ripe tomatoes, diced
  • 1 small onion, finely chopped
  • 2 cloves garlic, minced
  • 1/2 cup frozen peas (thawed)
  • 2 tablespoons vegetable oil
  • 1 tablespoon soy sauce
  • 1 tablespoon tomato paste
  • 1/2 teaspoon ground cumin
  • 1/2 teaspoon paprika
  • Salt and pepper to taste
  • Fresh cilantro or green onions for garnish (optional)

Method:

  1. Heat the Vegetable Oil: In a large skillet or wok, heat the vegetable oil over medium-high heat.
  2. Sauté the Onions and Garlic: Add the chopped onions to the hot oil and sauté until they become translucent. Add the minced garlic and continue to cook for another minute until the garlic becomes fragrant.
  3. Add the Tomatoes and Spices: Stir in the diced tomatoes, ground cumin, and paprika. Cook the tomatoes until they soften and release their juices.
  4. Incorporate the Rice: Add the cooked rice to the skillet and mix well with the tomatoes and onions. Make sure the rice is coated with the tomato juices and spices.
  5. Season the Fried Rice: Drizzle soy sauce and tomato paste over the rice and mix thoroughly to evenly distribute the flavours. Season with salt and pepper to taste.
  6. Add the Peas: Toss in the thawed peas and continue to cook the fried rice for a few more minutes until the peas are heated through.
  7. Garnish and Serve: If desired, garnish the Tomato Fried Rice with fresh cilantro or green onions for added freshness and colour.
  8. Serve and Enjoy: Tomato Fried Rice is a delicious and satisfying dish that can be enjoyed on its own or served as a side dish to accompany your favourite Asian-inspired main courses.

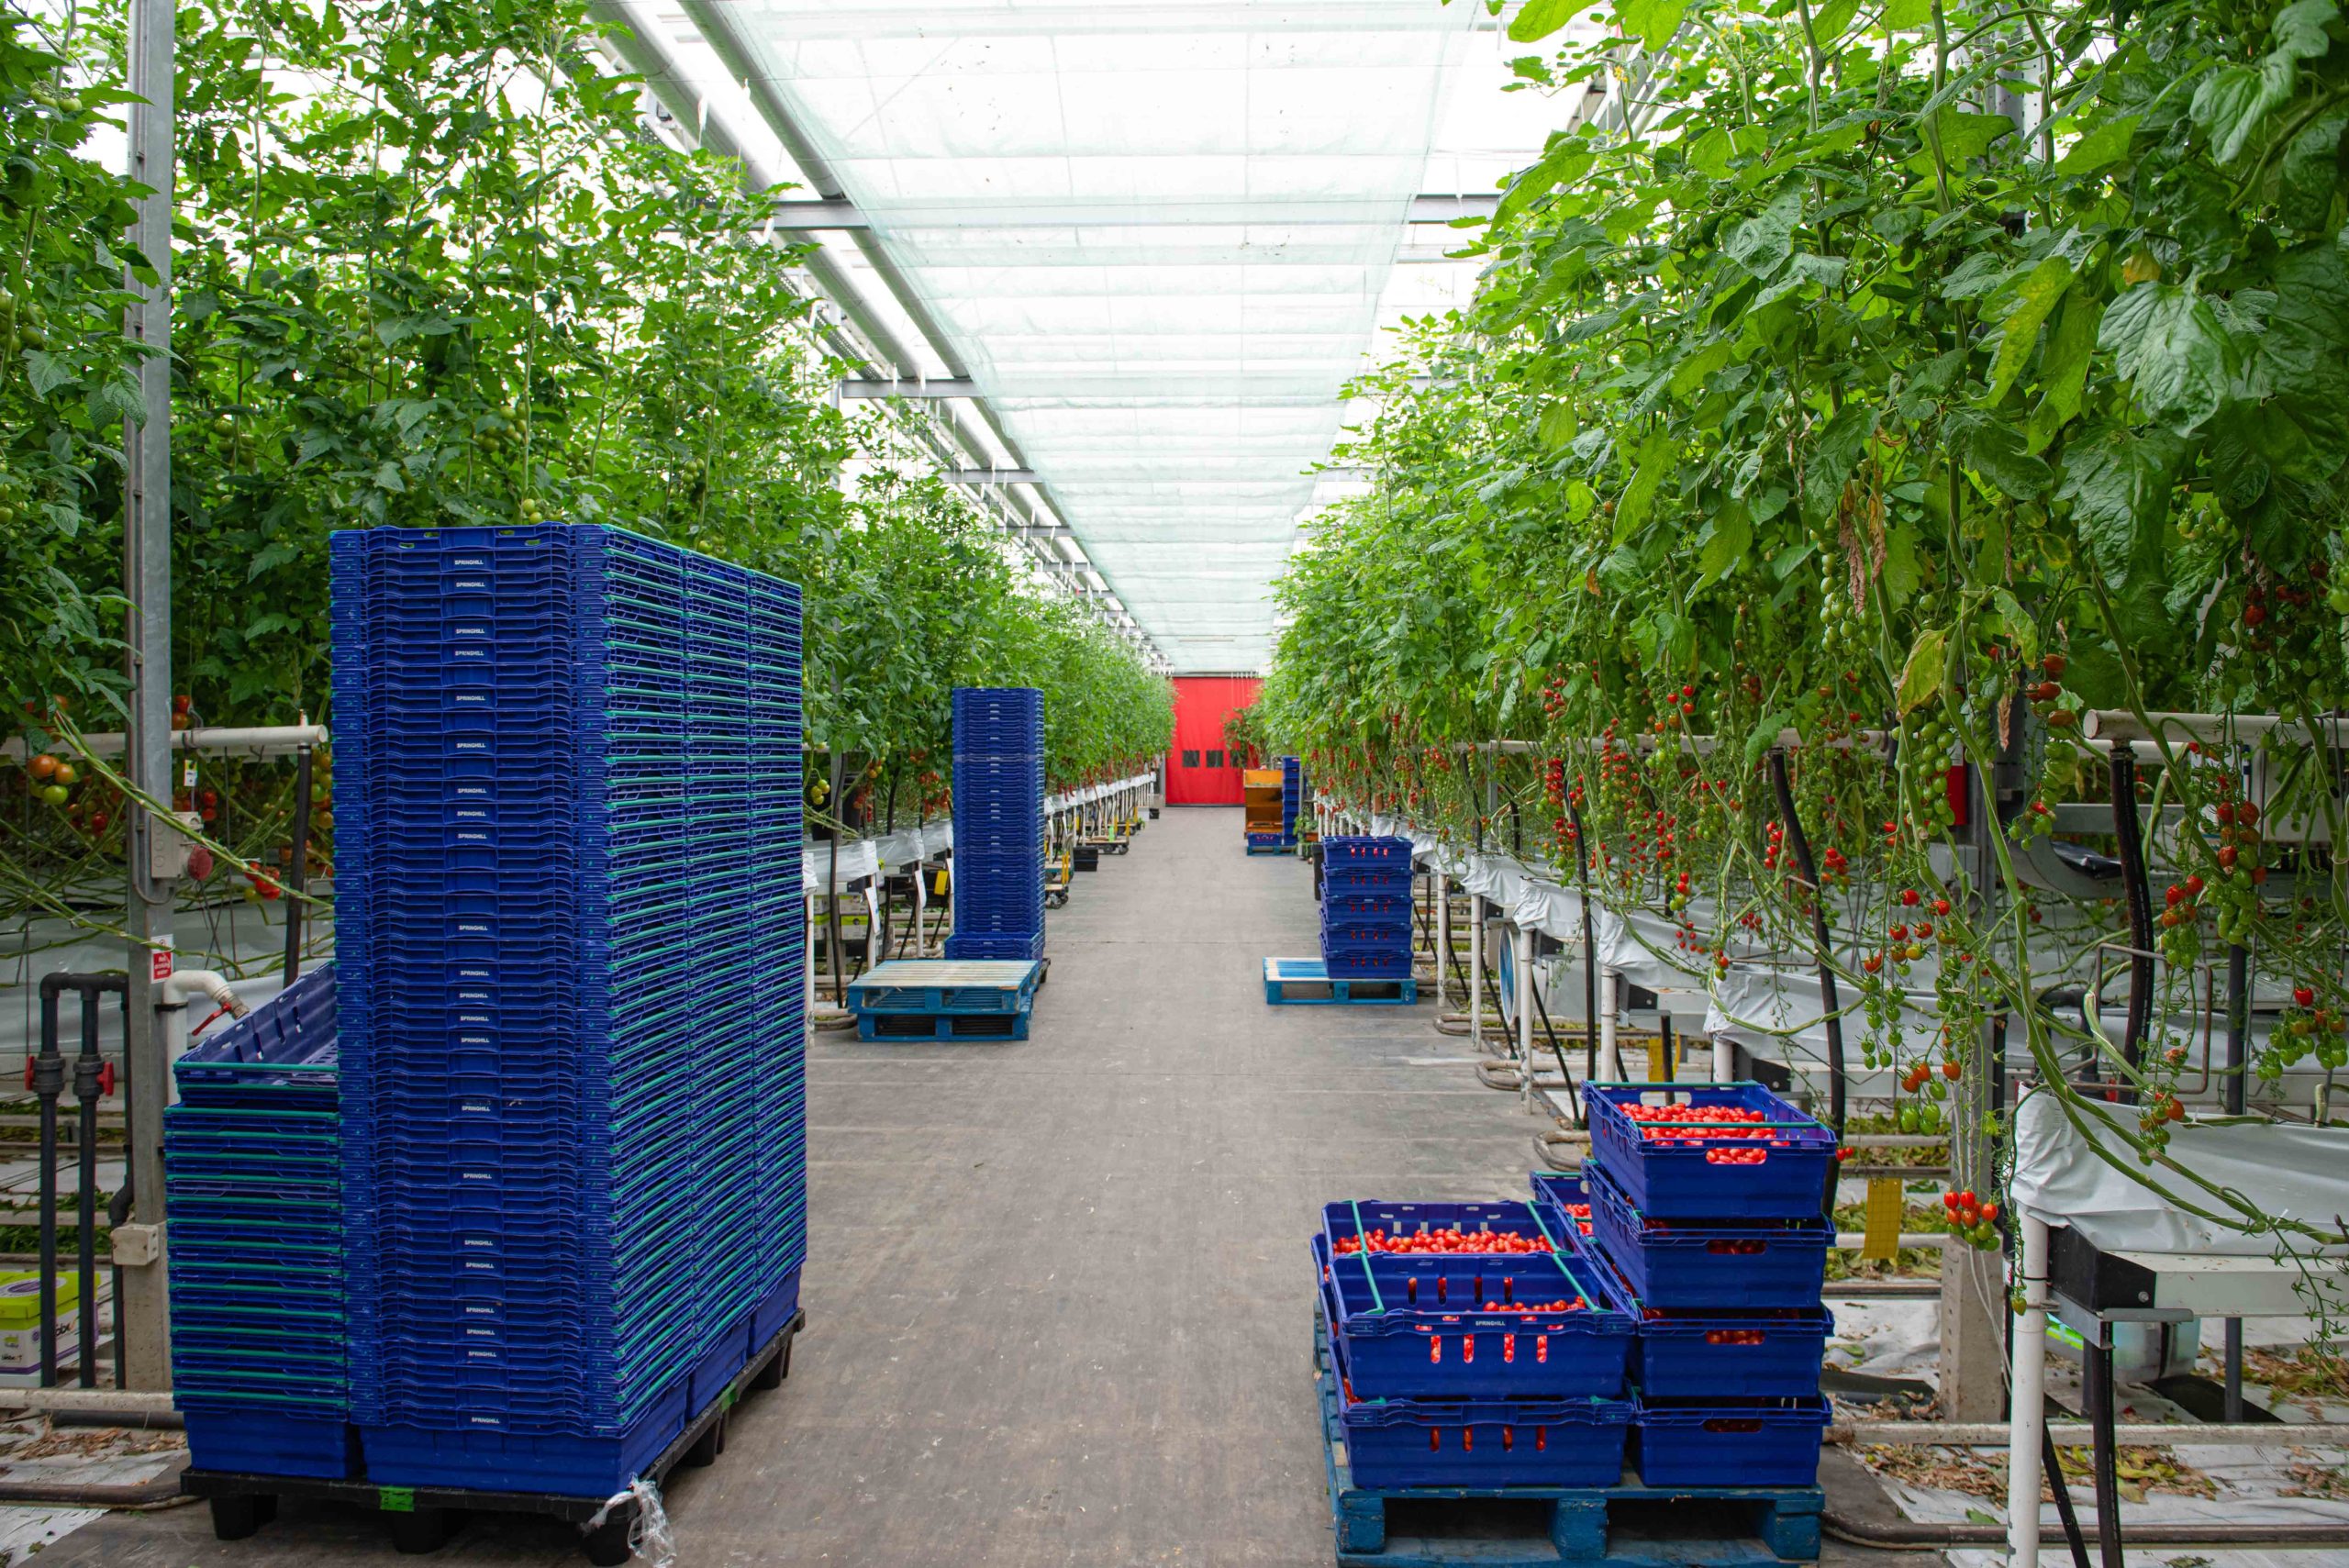
Whiteflies are tiny, sap-sucking insects that can wreak havoc on tomatoes and other plants in glasshouses, leading to stunted growth, wilting, and reduced yields. Controlling these pests is essential to maintaining a healthy and thriving greenhouse environment. In this blog, we will explore three effective points to combat whitefly infestations and protect your precious plants.

1.Implement Biological Control Methods: Biological control is a sustainable and eco-friendly approach to managing whitefly populations in glasshouses. By introducing natural predators and parasites, you can create a balanced ecosystem that keeps whiteflies in check. Here are some beneficial insects to consider:

Encarsia Formosa: This tiny parasitic wasp is a natural enemy of whiteflies. Encarsia formosa lays its eggs inside whitefly nymphs, eventually killing them. Release these wasps early in the season when whiteflies are just starting to appear.

Ladybirds: Ladybirds are voracious predators of whitefly eggs, larvae, and adults. They can be released in glasshouses to control whitefly populations effectively.

2. Practice Good Cultural Management: Proper cultural practices can significantly reduce the chances of whitefly infestations and keep your plants healthier overall. Consider the following steps:

Regular Inspection: Regularly inspect your plants for early signs of whitefly infestations, such as tiny white insects on the undersides of leaves or yellowing foliage. Early detection allows for timely action to prevent the infestation from spreading.

Remove Infested Leaves: At the first signs of whitefly presence, remove and dispose of infested leaves promptly to prevent the insects from spreading to other parts of the glasshouse.

Maintain Cleanliness: Whiteflies are attracted to sticky residues and honeydew secretions left behind by aphids and other pests. Keep your glasshouse clean by regularly removing debris and controlling other pests to discourage whitefly infestations.

3.Use Horticultural Oils and Soaps: Horticultural oils and insecticidal soaps are effective, low-toxicity options for controlling whiteflies in glasshouses. These products suffocate the pests, making them a safe choice for indoor environments. Here’s how to use them:

Follow Manufacturer Instructions: Read and follow the instructions on the product label carefully. Apply the horticultural oil or insecticidal soap as directed, ensuring even coverage on the undersides of leaves where whiteflies often hide.

Repeat Applications: Since horticultural oils and soaps primarily target the adult whiteflies and not their eggs, repeat applications may be necessary to control subsequent generations.

Test on a Small Area: Before applying horticultural oils or soaps to your entire glasshouse, test them on a small section of your plants to check for any adverse effects.

Implement these strategies to maintain the health and productivity of your precious plants in your glasshouse!

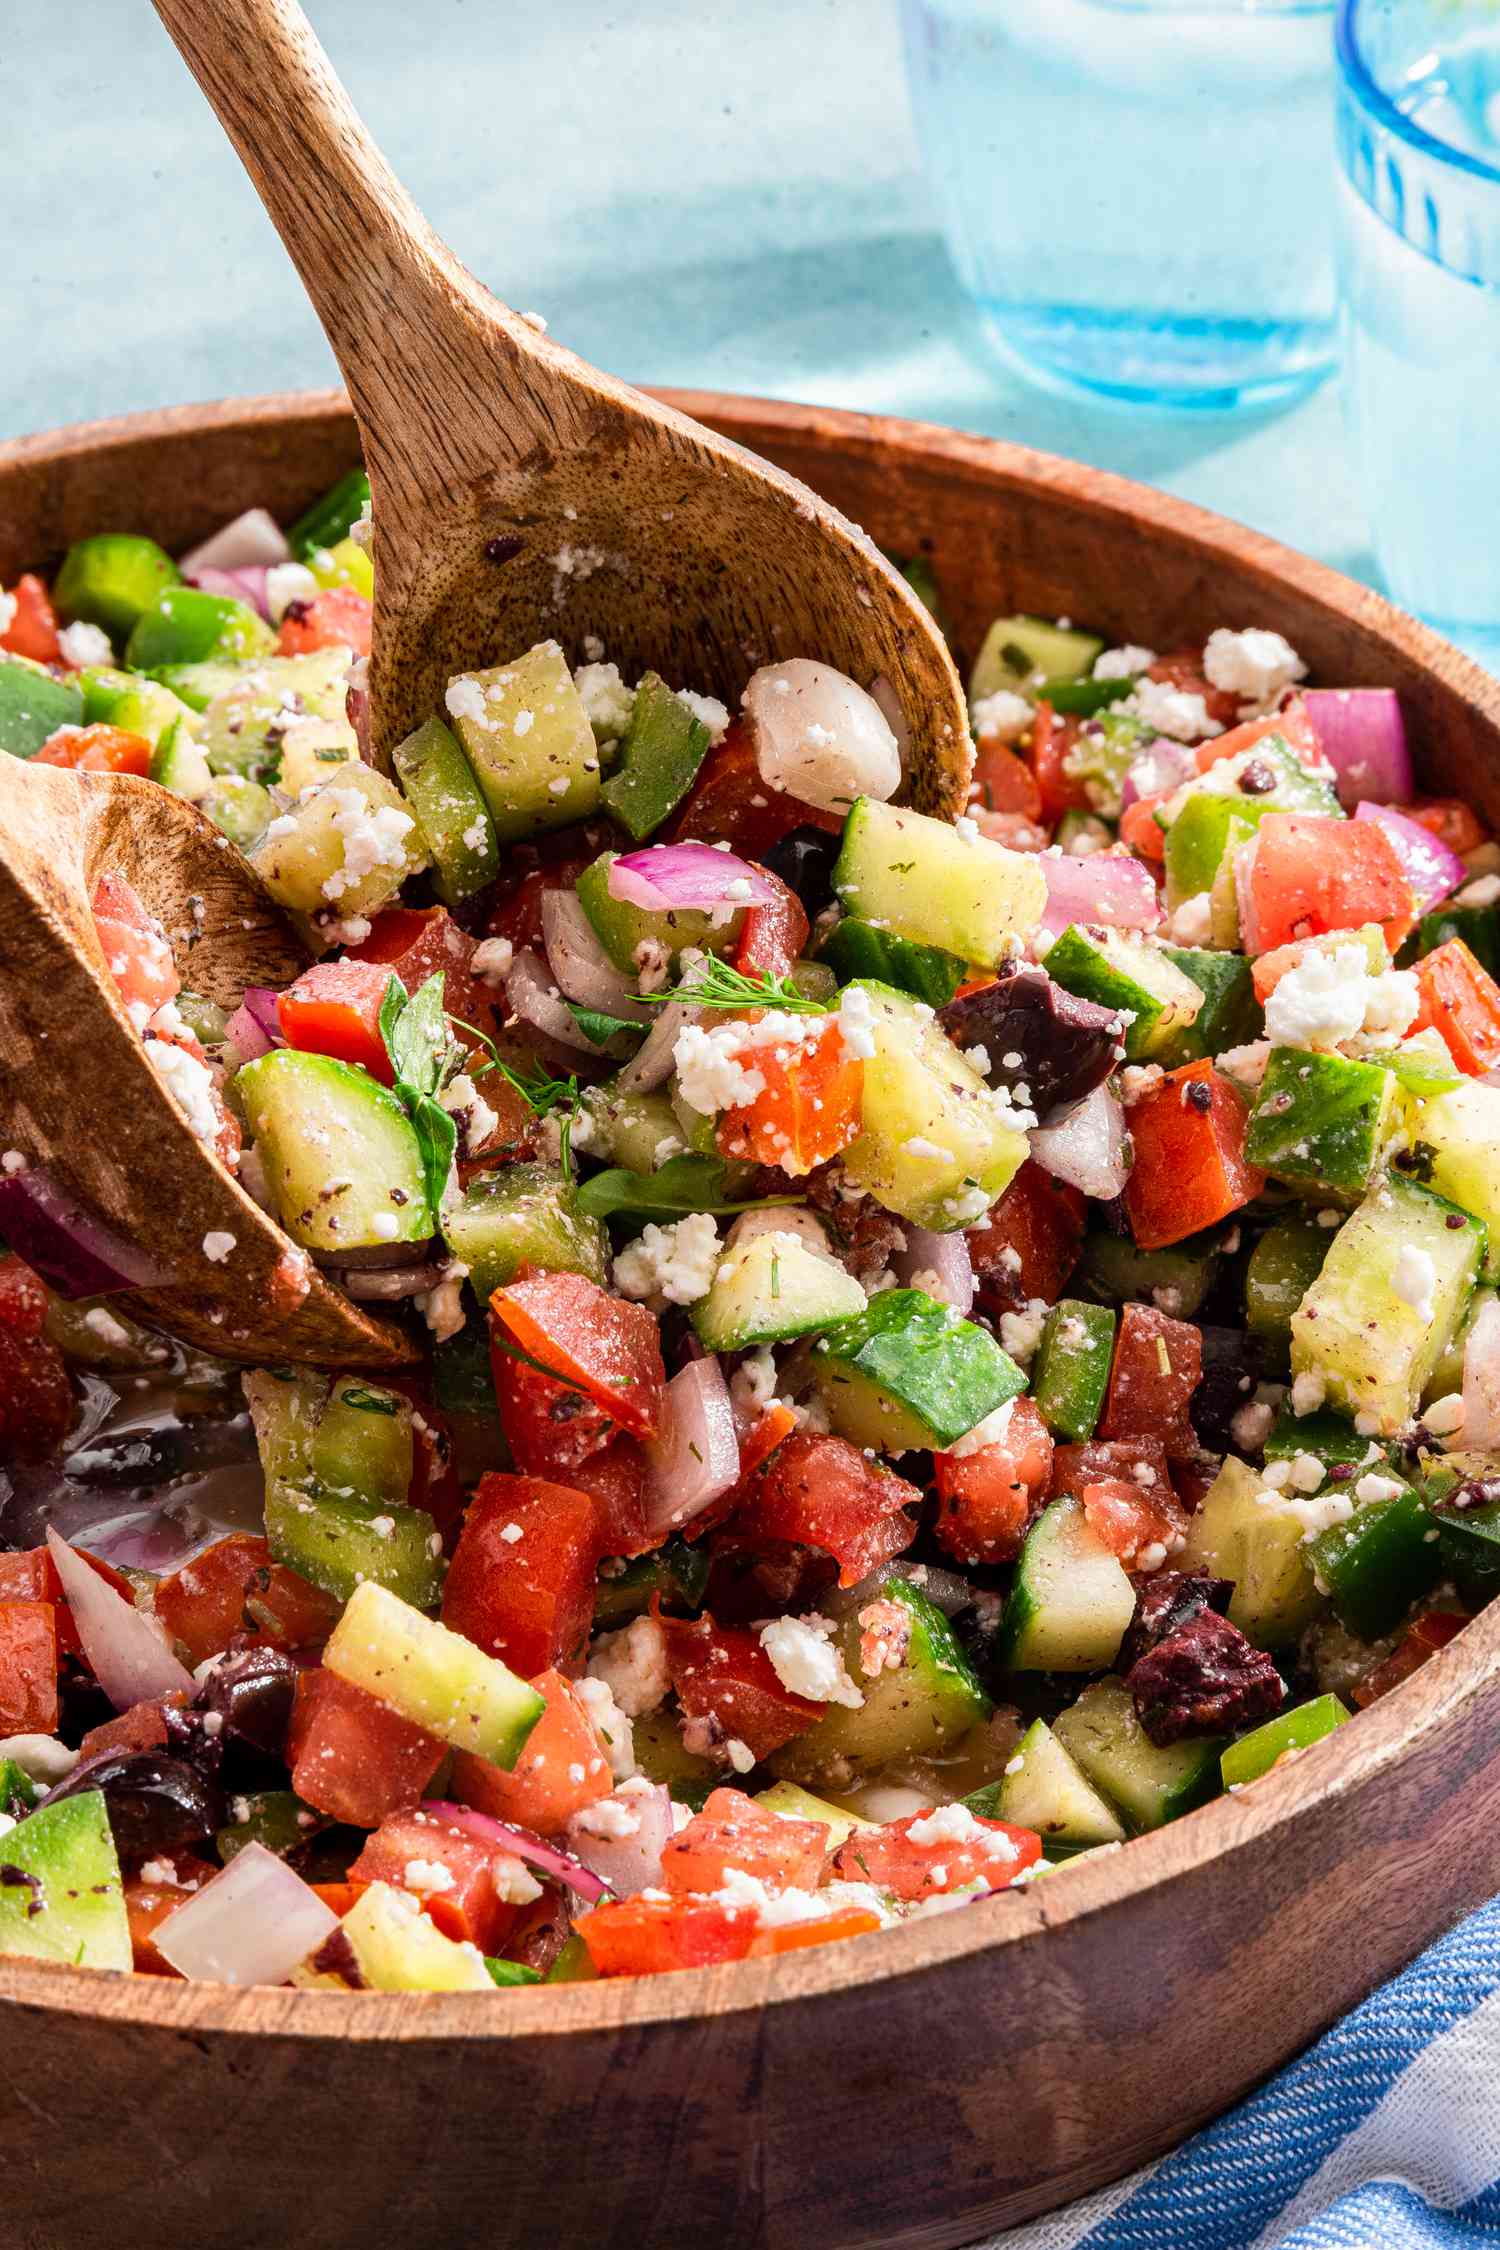
This Greek Salad is a classic Mediterranean dish that celebrates the fresh and vibrant flavours of ripe tomatoes and other wholesome ingredients. It’s perfect for hot summer days or any time you want a healthy and satisfying salad option. Enjoy the delightful combination of textures and flavours in this delicious Greek Salad!

 Ingredients:

  • 4 ripe tomatoes, cut into chunks or wedges
  • 1 cucumber, sliced
  • 1 red bell pepper, sliced
  • 1/2 red onion, thinly sliced
  • 1/2 cup Kalamata olives, pitted
  • 1/2 cup crumbled feta cheese
  • 2 tablespoons extra-virgin olive oil
  • 1 tablespoon red wine vinegar
  • 1 teaspoon dried oregano
  • Salt and pepper to taste
  • Fresh parsley or basil leaves for garnish (optional)

Method:

  1. Prepare the Vegetables: Wash and cut the tomatoes into bite-sized chunks or wedges. Slice the cucumber, red bell pepper, and red onion into thin slices. Place all the vegetables in a large salad bowl.
  2. Add the Olives and Feta: Add the pitted Kalamata olives and crumbled feta cheese to the bowl with the vegetables. The briny olives and creamy feta will add a burst of flavour to the salad.
  3. Make the Dressing: In a small bowl, whisk together the extra-virgin olive oil, red wine vinegar, dried oregano, salt, and pepper. The dressing should be tangy with a hint of herbaceousness.
  4. Dress the Salad: Pour the dressing over the salad and toss gently to coat all the ingredients evenly. Be careful not to crush the feta cheese while tossing.
  5. Garnish and Serve: If desired, garnish the Greek Salad with fresh parsley or basil leaves for a pop of colour and added freshness.
  6. Serve and Enjoy: Serve the Greek Salad with Tomatoes immediately as a light and refreshing appetizer or as a side dish to accompany your favourite Greek main courses, such as grilled lamb, chicken souvlaki, or moussaka.

Fried Green Tomatoes are a Southern American delicacy, and their crispy, tangy flavour is sure to delight your taste buds. Whether served as an appetizer, a side dish, or a unique addition to a sandwich or burger, these fried tomatoes are a delightful treat that everyone will enjoy!

Ingredients:

  • 4 green tomatoes, firm and unripe
  • 1 cup all-purpose flour
  • 1 teaspoon paprika
  • 1/2 teaspoon garlic powder
  • 1/2 teaspoon onion powder
  • 1/4 teaspoon cayenne pepper (optional, for added heat)
  • Salt and pepper to taste
  • 2 large eggs
  • 1/4 cup buttermilk (or regular milk)
  • 1 cup cornmeal or breadcrumbs
  • Vegetable oil, for frying

Method:

  1. Slice the Green Tomatoes: Cut the green tomatoes into 1/4-inch thick slices. Remove any stems or tough cores.
  2. Prepare the Dredging Station: In three separate shallow dishes, set up the dredging station. In the first dish, combine the flour, paprika, garlic powder, onion powder, cayenne pepper (if using), salt, and pepper. In the second dish, beat the eggs with the buttermilk. Place the cornmeal or breadcrumbs in the third dish.
  3. Dredge the Tomato Slices: Working one slice at a time, coat each tomato slice in the flour mixture, shaking off any excess. Next, dip it into the egg mixture, allowing any excess to drip off. Finally, coat the tomato slice in the cornmeal or breadcrumbs, pressing gently to adhere the coating.
  4. Heat the Oil: In a large skillet or frying pan, heat about 1/4 inch of vegetable oil over medium-high heat until it reaches around 175°C. To test if the oil is ready, drop a small piece of bread into the oil; if it sizzles and turns golden brown, the oil is hot enough.
  5. Fry the Tomato Slices: Carefully place the coated tomato slices into the hot oil, making sure not to overcrowd the pan. Fry the tomatoes for about 2-3 minutes per side, or until they are golden brown and crispy. Use a slotted spoon to remove the fried tomatoes from the oil and place them on a plate lined with paper towels to drain any excess oil.
  6. Serve and Enjoy: Serve the Fried Green Tomatoes while they’re still warm and crispy. They are delicious on their own or with a side of remoulade sauce, ranch dressing, or a sprinkle of grated Parmesan cheese for added flavour.

Sustainability is a critical concept that emphasises the preservation of natural resources. It encompasses various aspects, such as environmental, economic, and social considerations, all working together to create a balanced and harmonious ecosystem. The importance of sustainability cannot be overstated, as it plays a vital role in addressing pressing global challenges.

At R&L Holt, we recognise the importance of sustainable practices and use it in our work as much as we can. Here’s what we do at R&L Holt to do our bit for the environment:

  • We use recycled woodchip in boilers to provide hot water to heat the glasshouses which is stored in buffer tanks.
  • Carbon dioxide, a byproduct of an anaerobic digestor is used in the crops to aid photosynthesis.
  • Solar panels provide the power to run pumps that irrigate the crops and climate control helps to ensure we are not wasting energy.
  • Thermal screens keep heat in the glasshouse, but also help to shade the crops during bright weather.
  • LED lighting uses up to 40% less electricity than conventional lighting that is powered by on site CHP plants. This reduces the requirement to import power and therefore not rely on the National Grid supply.

We are always looking for ways we can work more sustainably and are striving for a greener future.

This vibrant salad combines the juicy sweetness of tomatoes, the crisp and refreshing texture of jicama, the creamy richness of avocado, and the zesty kick of lime. The combination of flavours and textures creates a perfect balance for a delightful summer salad.

Ingredients:

  • 4 medium-sized tomatoes, preferably heirloom, sliced
  • 1 small jicama, peeled and cut into matchsticks
  • 1 ripe avocado, sliced
  • 1/2 red onion, thinly sliced
  • 1/4 cup fresh cilantro leaves, chopped
  • Juice of 1 lime
  • 2 tablespoons extra-virgin olive oil
  • Salt and pepper to taste

Instructions:

  1. In a large serving bowl, arrange the sliced tomatoes, jicama matchsticks, avocado slices, and red onion slices.
  2. In a small bowl, whisk together the lime juice, olive oil, salt, and pepper to make the dressing.
  3. Drizzle the dressing over the tomato salad and gently toss to coat all the ingredients evenly.
  4. Sprinkle the chopped cilantro leaves over the salad for added freshness and flavour.
  5. Let the salad sit for a few minutes to allow the flavours to meld together.
  6. Serve the Summer Tomato Salad with Jicama and Avocado as a refreshing side dish or a light lunch option.

This Tomato Lemonade is a fantastic way to use fresh tomatoes and create a refreshing drink that’s perfect for the hot summer days. The tanginess of tomatoes and the zesty brightness of lemons create a delightful and unexpected flavour combination. Sip and savour the invigorating taste of this homemade tomato lemonade!

Ingredients:

  • 4 large tomatoes
  • 2 lemons
  • 4 cups water
  • 1/4 cup sugar (adjust according to taste)
  • Ice cubes
  • Fresh basil or mint leaves for garnish (optional)

Instructions:

  1. Wash the tomatoes and lemons thoroughly. Cut the tomatoes into quarters and squeeze the juice from the lemons.
  2. In a blender, combine the tomato quarters and lemon juice. Blend until smooth.
  3. Place a fine-mesh strainer or cheesecloth over a pitcher or bowl. Pour the blended mixture through the strainer, pressing down with a spoon to extract as much liquid as possible. Discard any pulp or seeds left behind.
  4. Add water to the strained tomato and lemon juice mixture. Stir well.
  5. Gradually add sugar to the mixture, tasting as you go to achieve your desired sweetness. Adjust the amount of sugar according to your preference.
  6. Fill a glass with ice cubes and pour the tomato lemonade over the ice.
  7. Stir the drink to ensure the sugar is fully dissolved and well-incorporated.
  8. Garnish with fresh basil or mint leaves, if desired, for added aroma and visual appeal.
  9. Serve the Tomato Lemonade chilled and enjoy the unique combination of flavours.